Normal Difficulty Online Chess Worksheets for Grade 1 - Page 2
47 filtered results
Difficulty Level
Grade
Age
-
From - To
Subject
Activity
Standards
Interactive
Favorites
With answer key
Interactive

Set-up Quest Worksheet
Have your students mastered checkmates? However, they may not know the proper way to set up a chessboard. Ask them if they know how and show them images of the correct set-up.
Set-up Quest Worksheet
Worksheet

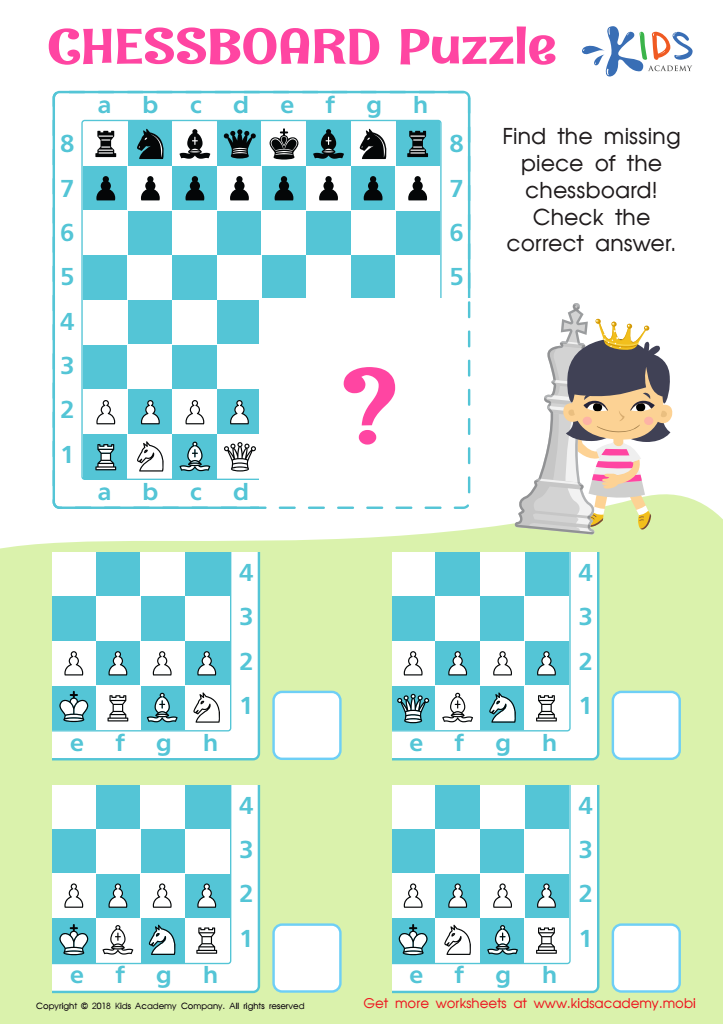
Chessboard Puzzle Worksheet
Test your child's chess prowess with this simple worksheet. They must find the missing pieces to complete the white side of an empty chessboard. The black pieces are already arranged properly on the board. Correct answers are provided so you can see how they did!
Chessboard Puzzle Worksheet
Worksheet
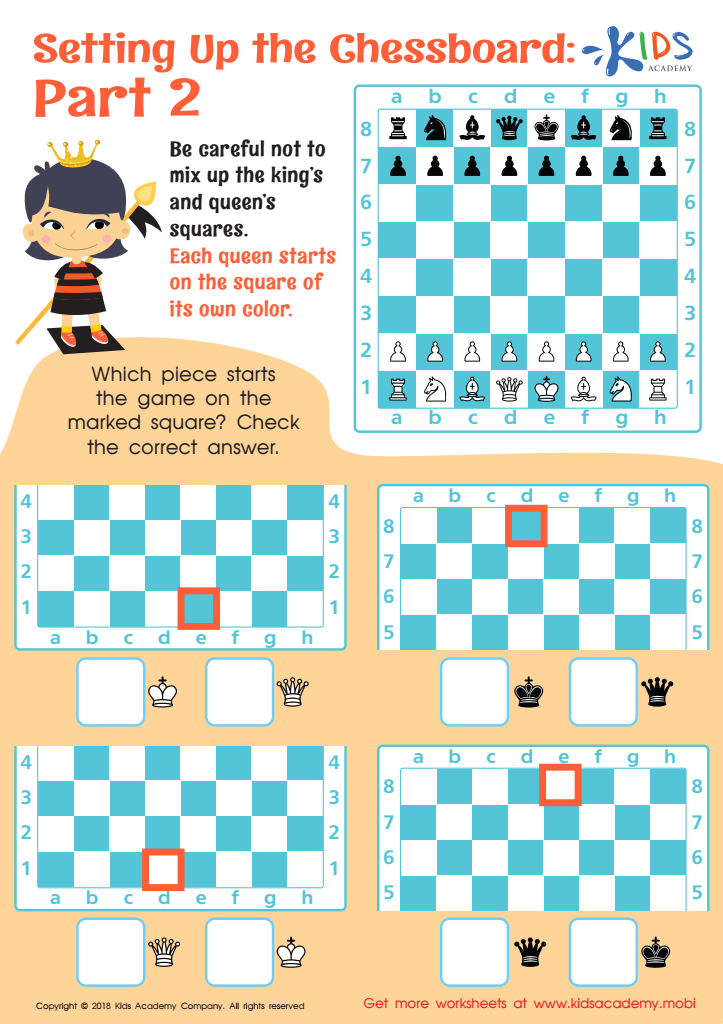
Setting up the Chessboard: Part 2 Worksheet
Before starting the game, make sure your child knows how to correctly set up the chessboard. Point to each square and ask them to name the piece that should be there. If they don't know, the printout can help. Remind them the queens should be on their own colour's square, then have them check the correct answers for the other pieces.
Setting up the Chessboard: Part 2 Worksheet
Worksheet
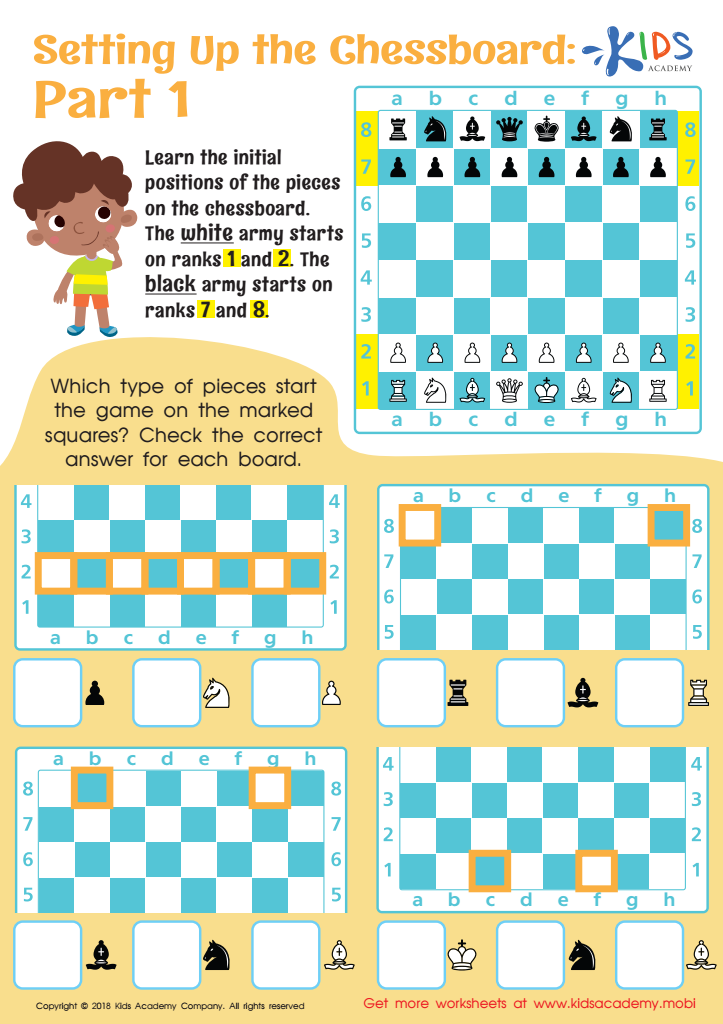
Setting up the Chessboard: Part 1 Worksheet
Teach your child the starting positions of the black and white armies on the chessboard. Black pieces are placed on ranks 7 and 8, and white pieces on ranks 1 and 2. Have them check the highlighted boxes on the chessboard to make sure they know the correct pieces to start with.
Setting up the Chessboard: Part 1 Worksheet
Worksheet
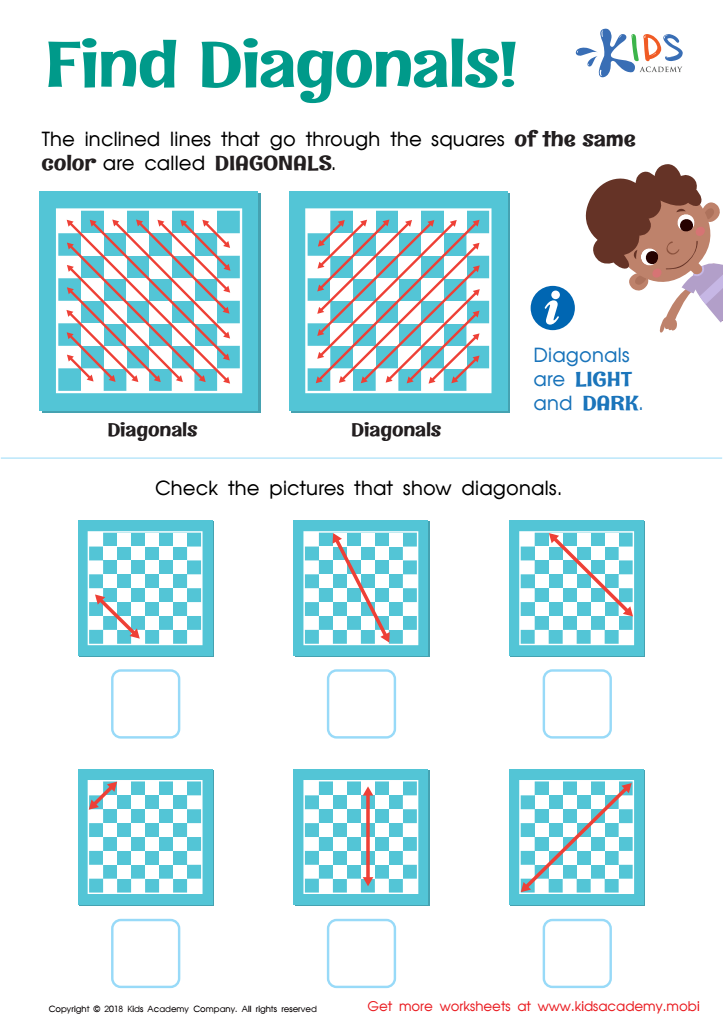
Find Diagonals Worksheet
Help your child learn the name of the lines that go through squares with this fun worksheet. Diagonals slant in left or right directions and create the same shape. Ask your child to identify the pictures with correctly drawn diagonals.
Find Diagonals Worksheet
Worksheet

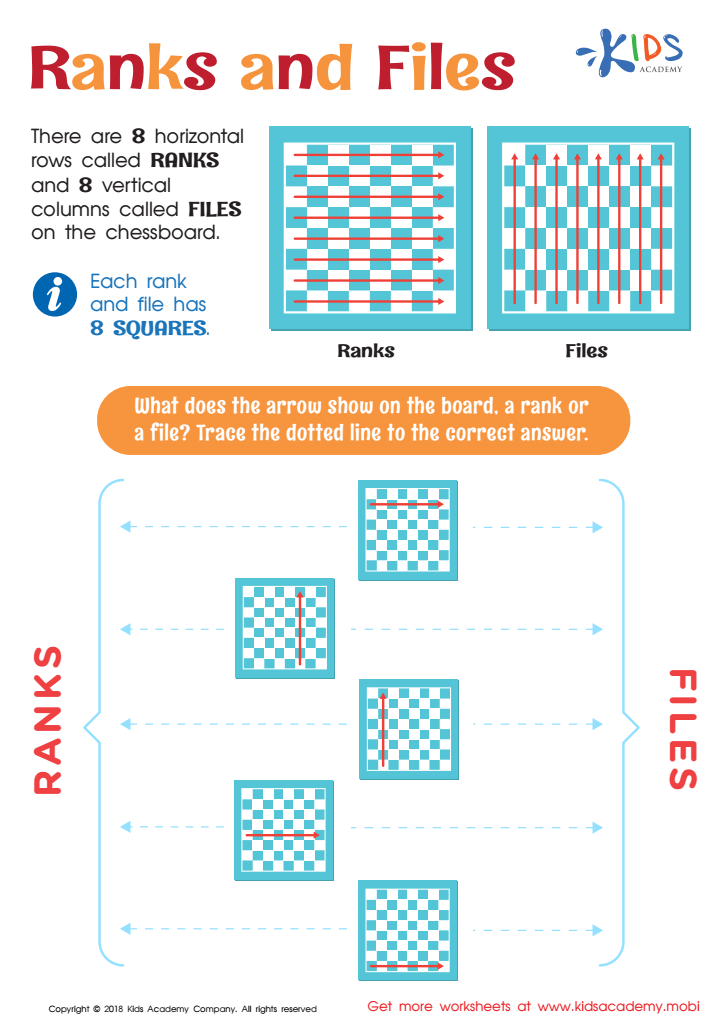
Ranks and Files Worksheet
A chessboard has 8 horizontal ranks and 8 vertical files, each with 8 squares. Test your child's understanding of these directions with this fun worksheet!
Ranks and Files Worksheet
Worksheet
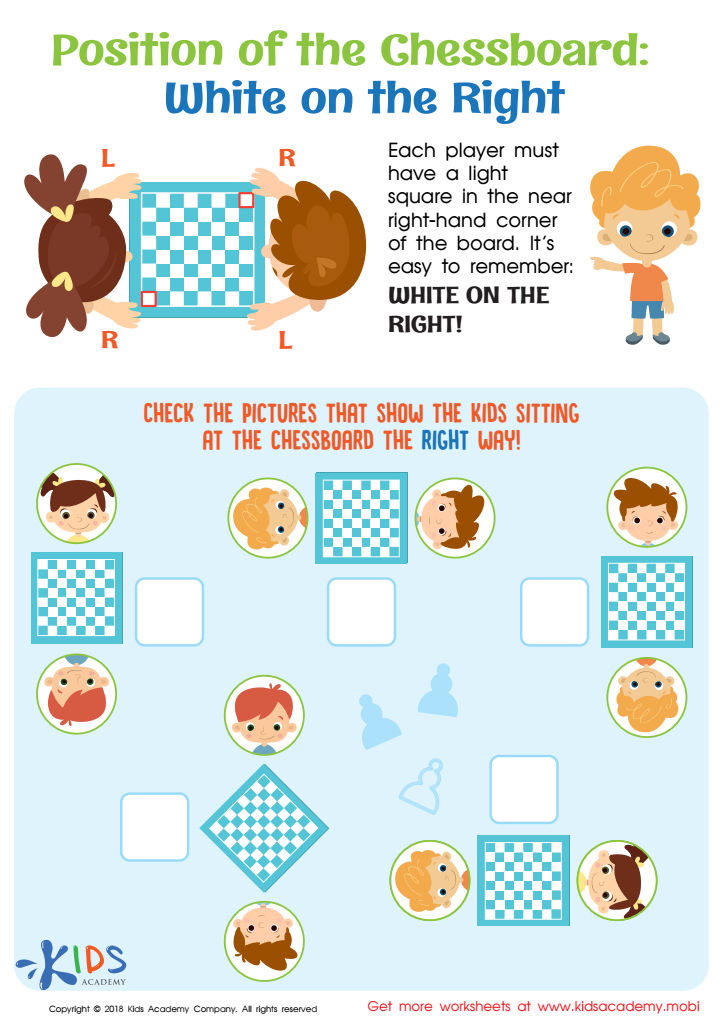
Position of the Chessboard: White on the Right Worksheet
Proper positioning of the chessboard and players is key. Before the game, make sure the white square is in the right-hand corner. A simple rhyme can help: "White on the right". Check pictures of kids at the chessboard to ensure correct positioning.
Position of the Chessboard: White on the Right Worksheet
Worksheet
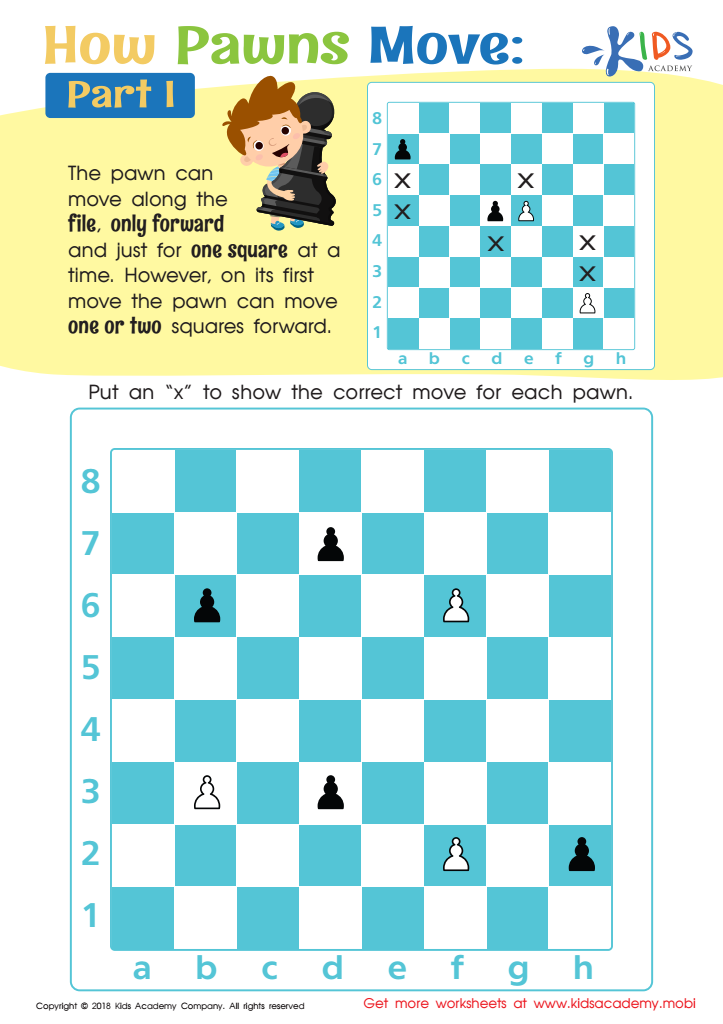
How Pawns Move: Part I Worksheet
Pawns can only move forward along the file one square at a time. For its first move, a pawn can move one or two squares. Show your child how to move pawns by asking them to put an X for the correct move on this worksheet. This exercise will help them gain confidence in using pawns.
How Pawns Move: Part I Worksheet
Worksheet
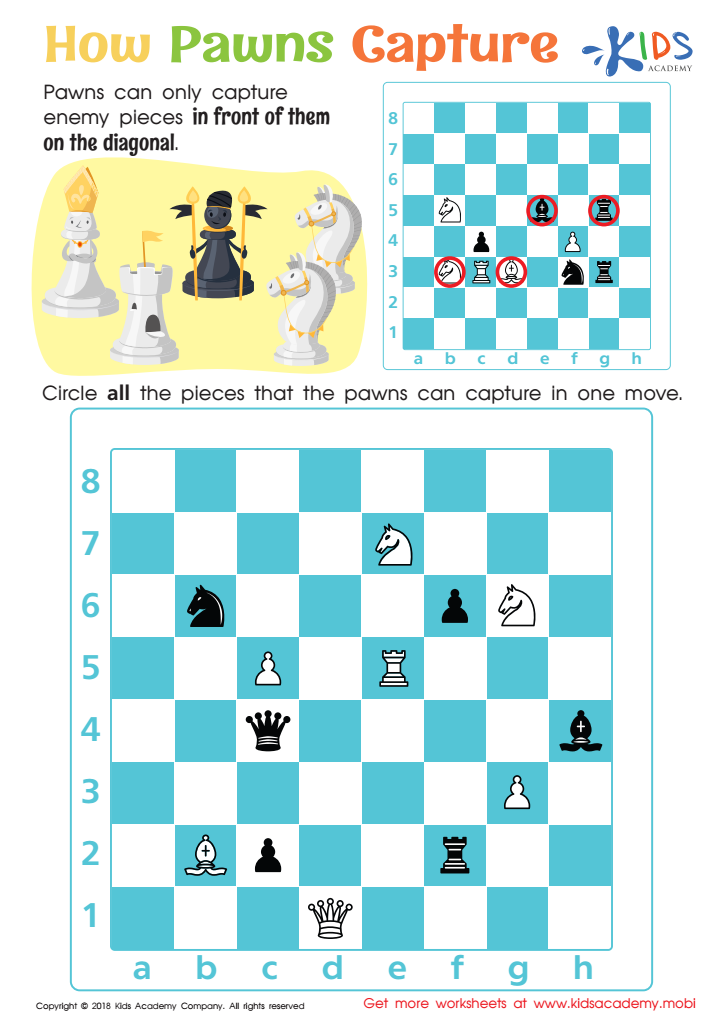
How Pawns Capture Worksheet
Ask your child to circle all the places a pawn can capture in one move on the diagonal. Pawns are limited in the moves they can make, but can still capture enemy pieces. This worksheet will help brush up on their knowledge of the rules of chess.
How Pawns Capture Worksheet
Worksheet

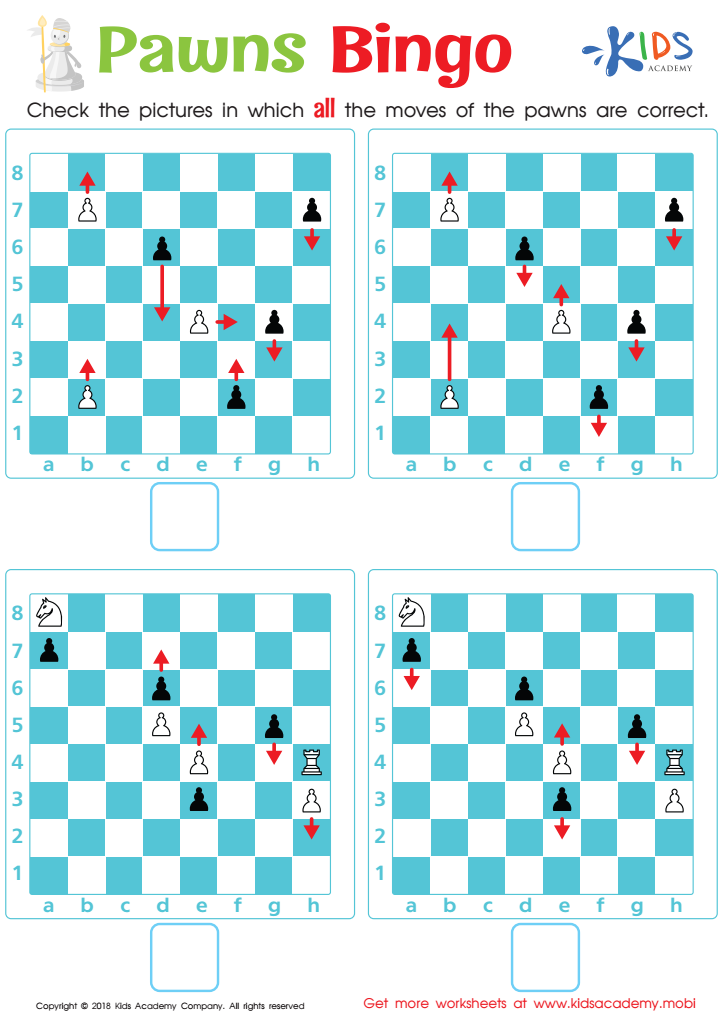
Pawns Bingo Worksheet
Test your students' knowledge of chess pawns. Present them with a worksheet featuring a picture, and ask them to identify the correct pawn moves. Afterward, they'll be better equipped to maneuver strategically on the chessboard.
Pawns Bingo Worksheet
Worksheet
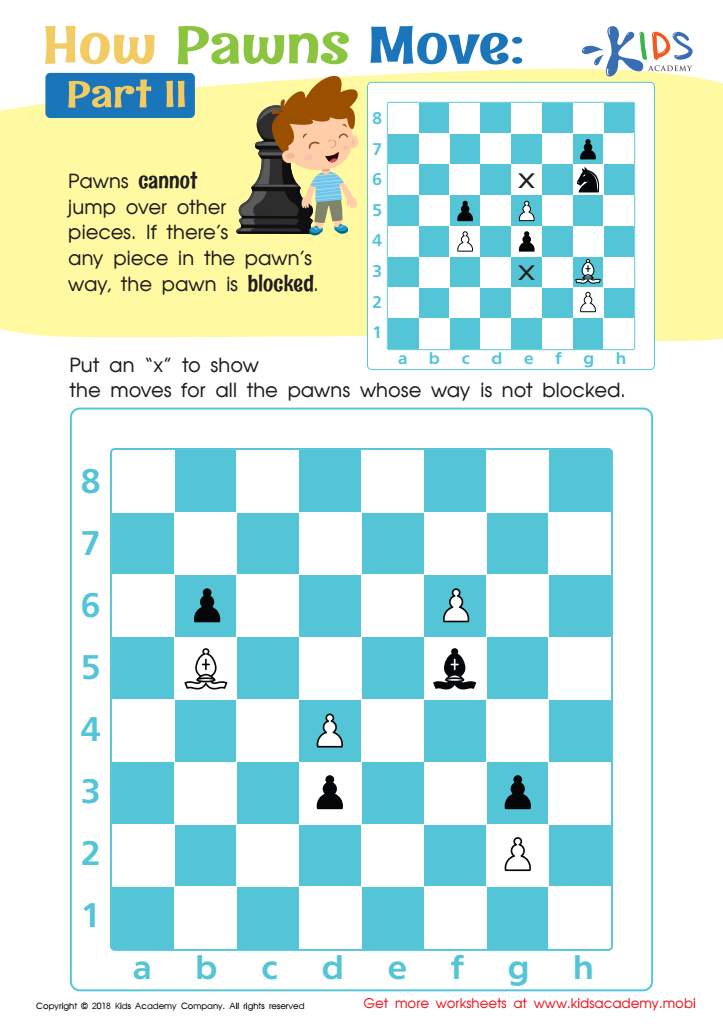
How Pawns Move: Part II Worksheet
Pawns are the first to attack in chess and each player has the most pieces. They can't jump over other pieces, so if there's an obstacle, the pawn can't move. Ask your child to put an X to show all possible moves for the pawns not blocked by other pieces. (80)
How Pawns Move: Part II Worksheet
Worksheet
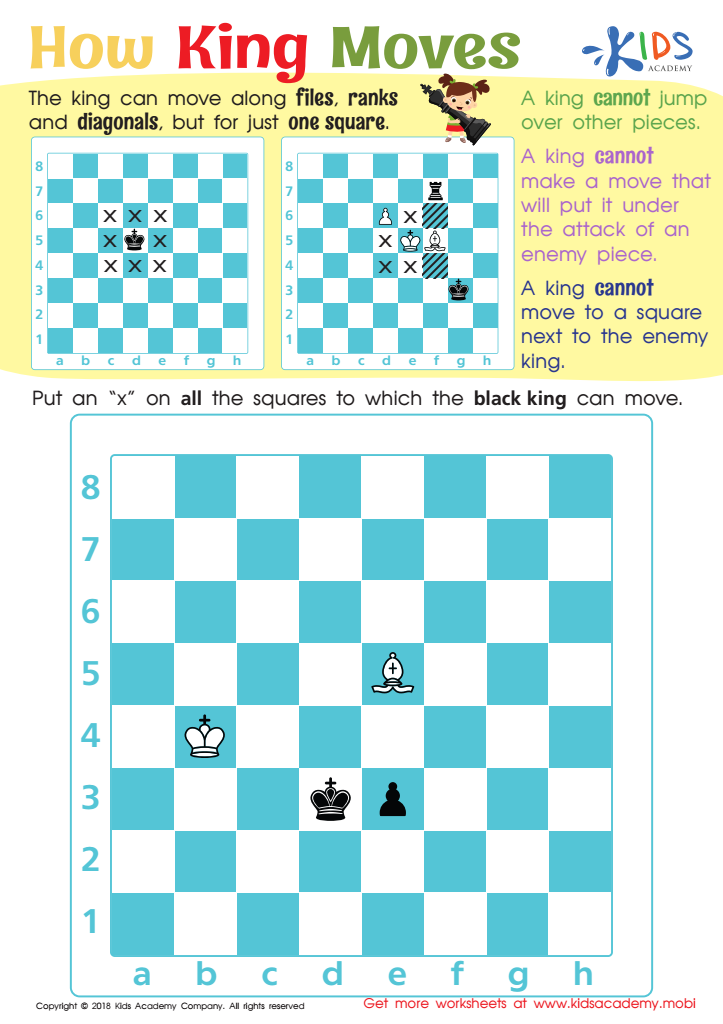
How King Moves Worksheet
Teach your kids the fundamentals of chess with this worksheet! The goal is to checkmate the opponent's king, so it must be protected at all times. The king moves along files, ranks, and diagonals (except one square at a time), and cannot move to a square next to the enemy king. Your kids will soon master the art of checkmate!
How King Moves Worksheet
Worksheet
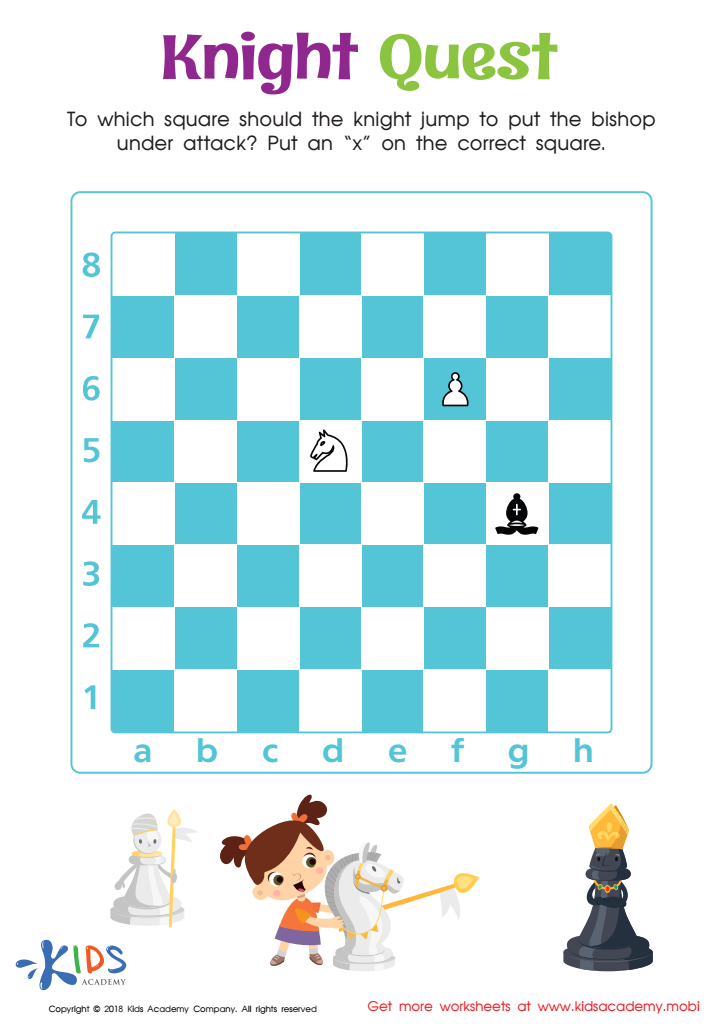
Knight Quest Worksheet
Testing your child's strategic planning and chess skills? Give them this worksheet: Ask them to mark an 'x' on the square where the knight should jump to attack the enemy bishop. See how well they plan for a win! (80 words)
Knight Quest Worksheet
Worksheet

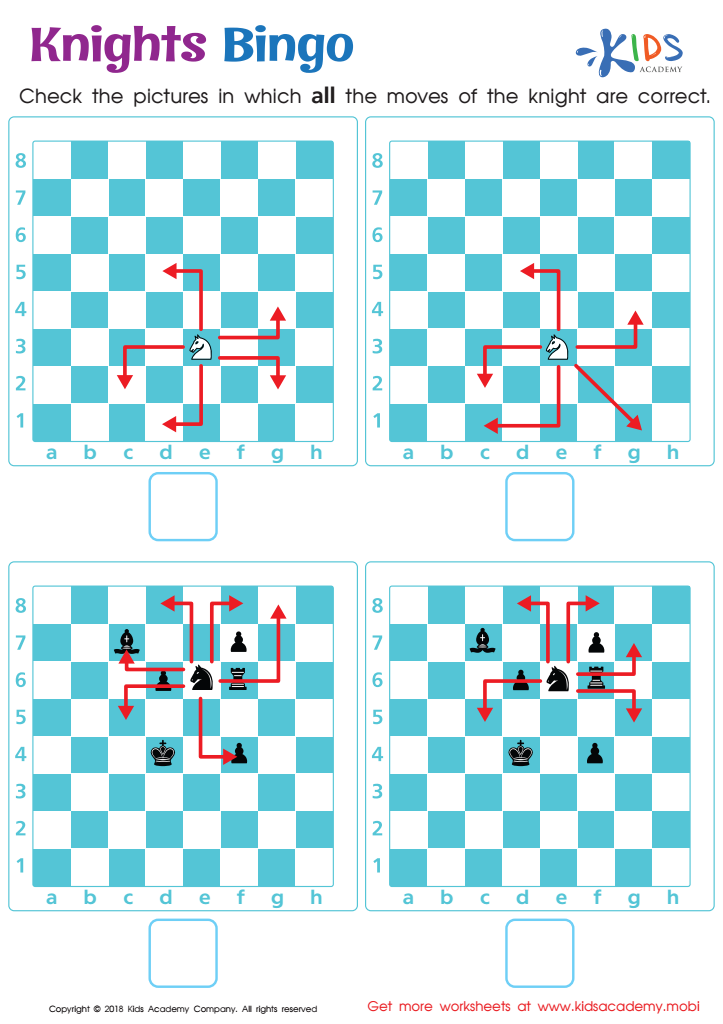
Knights Bingo Worksheet
Help your child identify legal knight moves in this easy worksheet. Review each picture with them, questioning if the knight moves are correct. Then have them verify pictures with correct moves.
Knights Bingo Worksheet
Worksheet
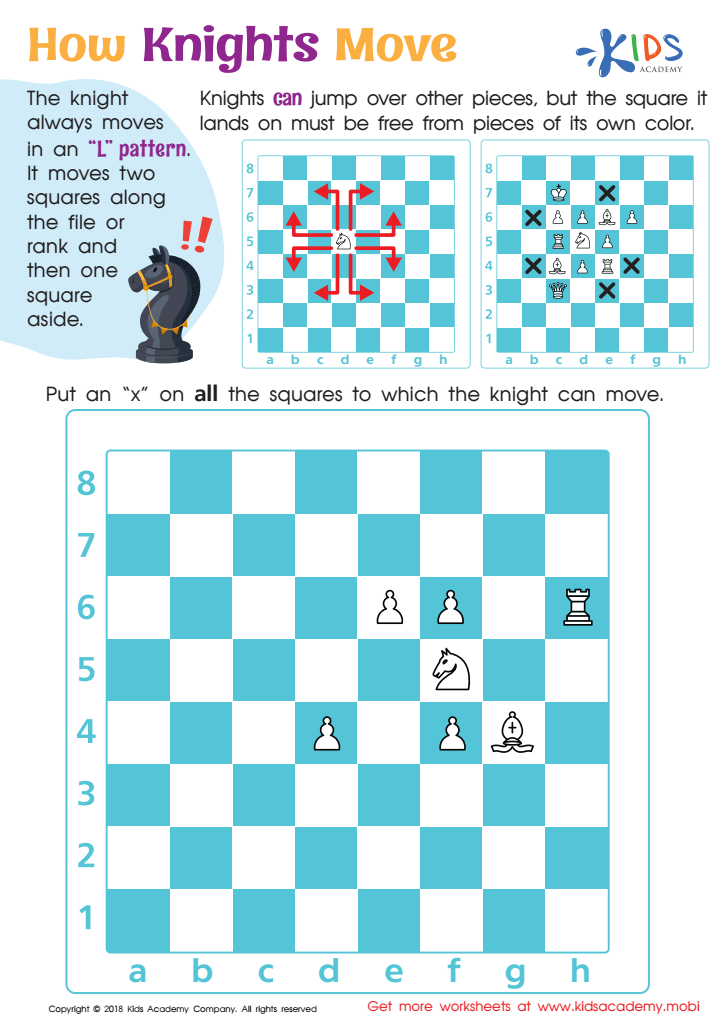
How Knights Move Worksheet
Get your kids to tell you how a knight moves in chess. If they need help, explain that a knight moves in an «L» pattern - two squares on the file/rank, one square aside. It may also jump over other pieces, as long as the landing square is unoccupied. Have them mark the squares where the knight can move in the exercise.
How Knights Move Worksheet
Worksheet
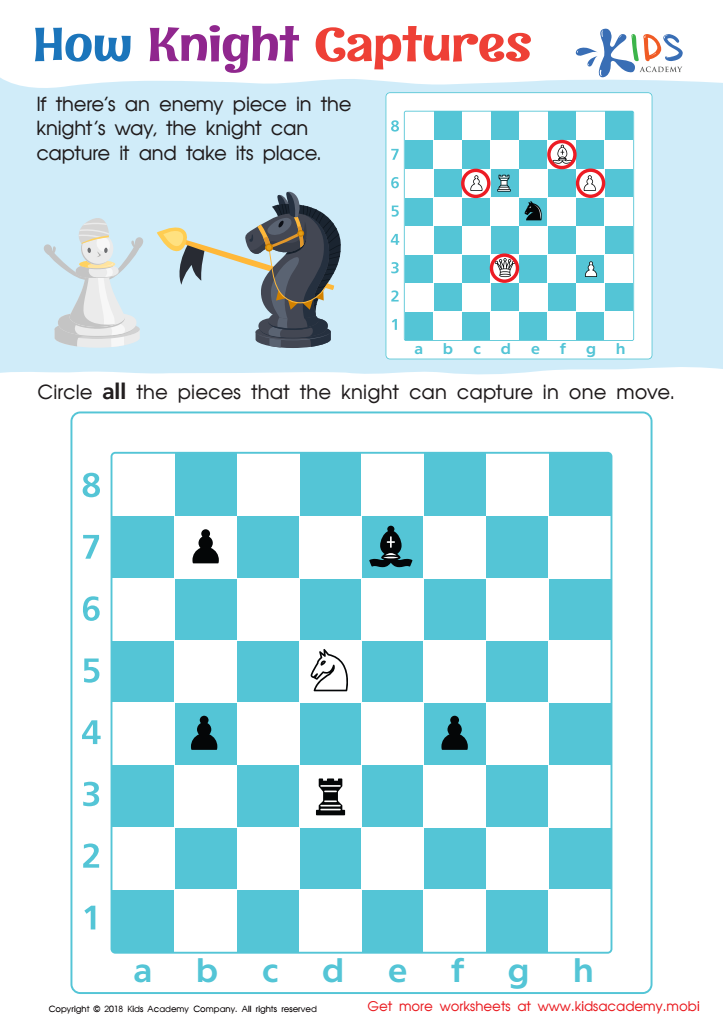
How Knight Captures Worksheet
Test your child's knowledge of chess pieces by asking them to identify the knight. It is shaped like a horse and its goal is to capture the enemy king in order to win the game. The knight has the advantage of being able to jump over other pieces, taking them out and taking their place. See how many pieces the knight can capture in one move with this worksheet.
How Knight Captures Worksheet
Worksheet
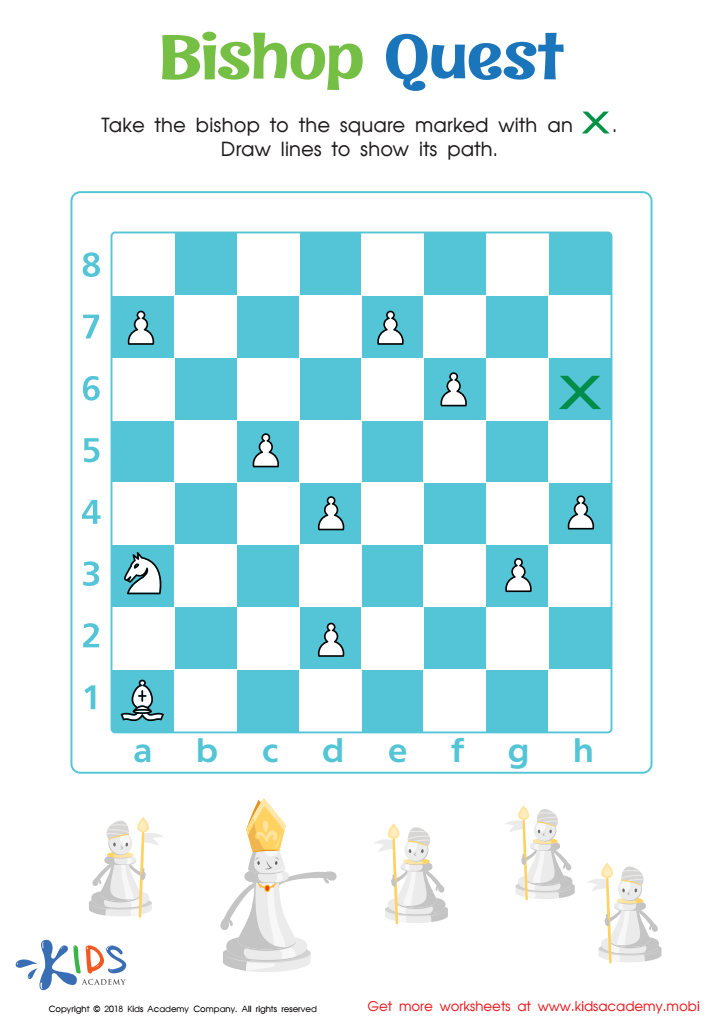
Bishop Quest Worksheet
Show kids the board and ask them to identify the bishop. Then ask them to move it to the square marked 'x', drawing lines to show its path. This worksheet helps teach kids how to move the bishop on a chessboard.
Bishop Quest Worksheet
Worksheet
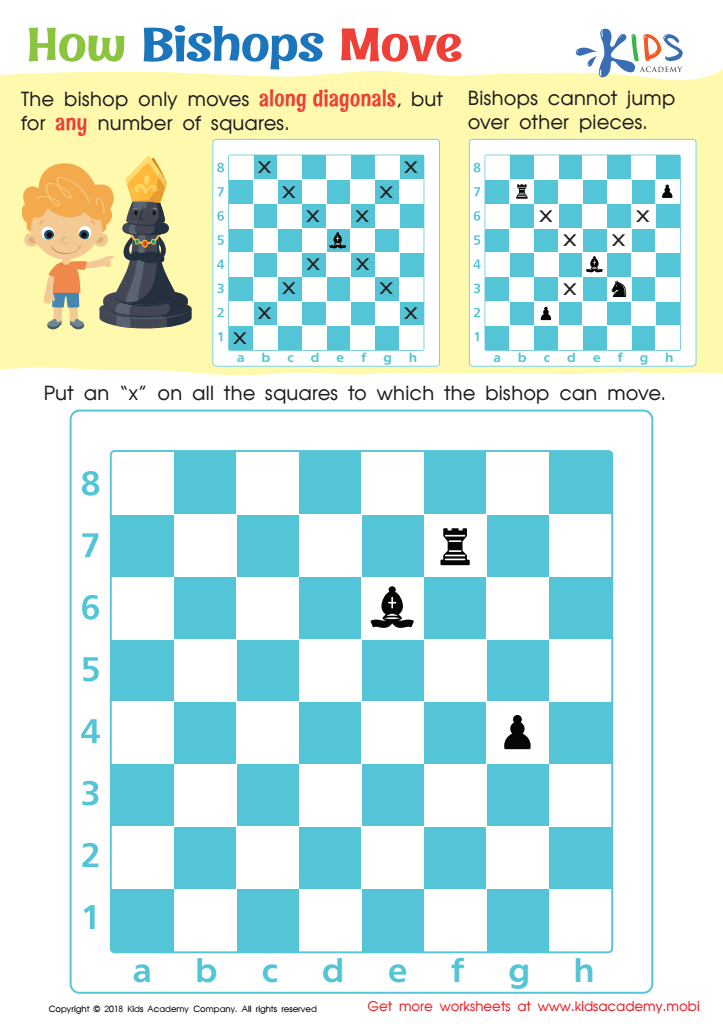
How Bishops Move Worksheet
There is no such thing as too much sharpening of skills. Encourage your child to learn more about chess technicalities with this simple worksheet. It shows them how a bishop moves: along diagonals any number of squares, but it can't jump over other pieces.
How Bishops Move Worksheet
Worksheet
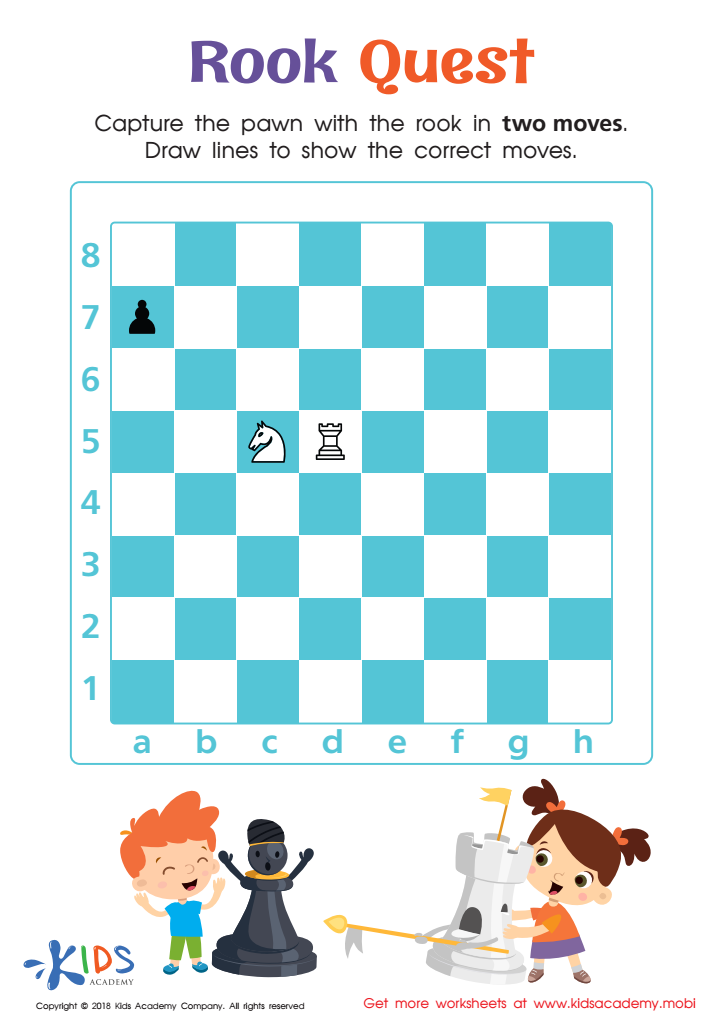
Rook Quest Worksheet
Is your child a chess whiz? Check their progress with this rook quest: get the enemy's pawn piece in just two moves. Have them draw the lines for the moves they'll make. See how quickly they master it!
Rook Quest Worksheet
Worksheet
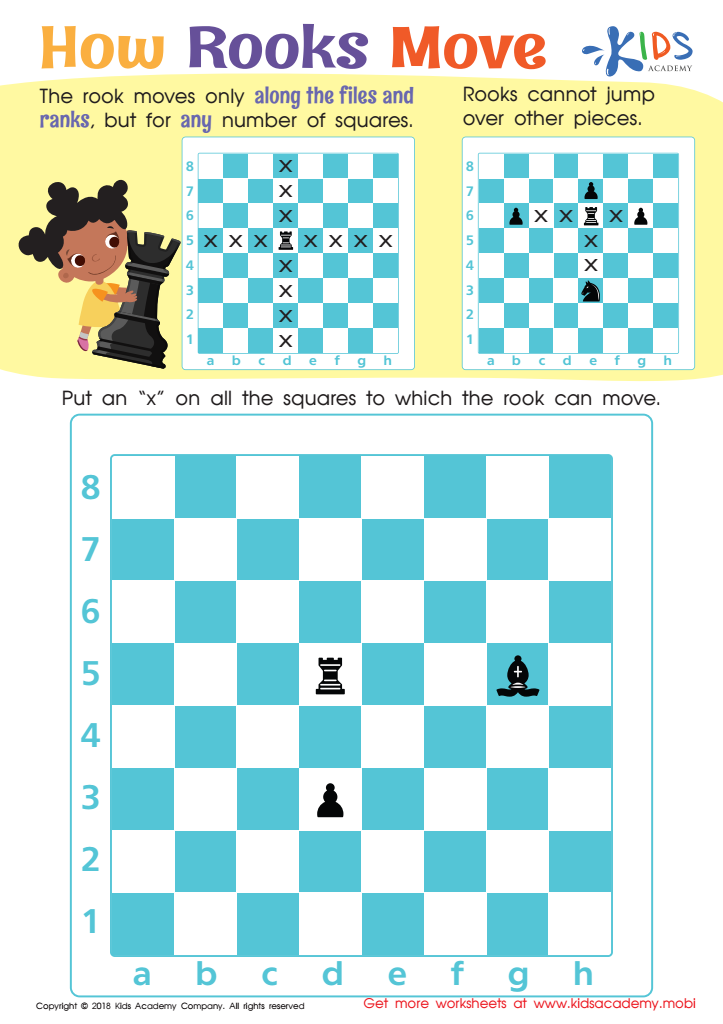
How Rooks Move Worksheet
Help your kids master chess with this worksheet! Explain how rook pieces move along ranks and files, and have them mark the squares it can move to. Note that it can't jump over other pieces. With your guidance, they'll soon understand the game they love.
How Rooks Move Worksheet
Worksheet
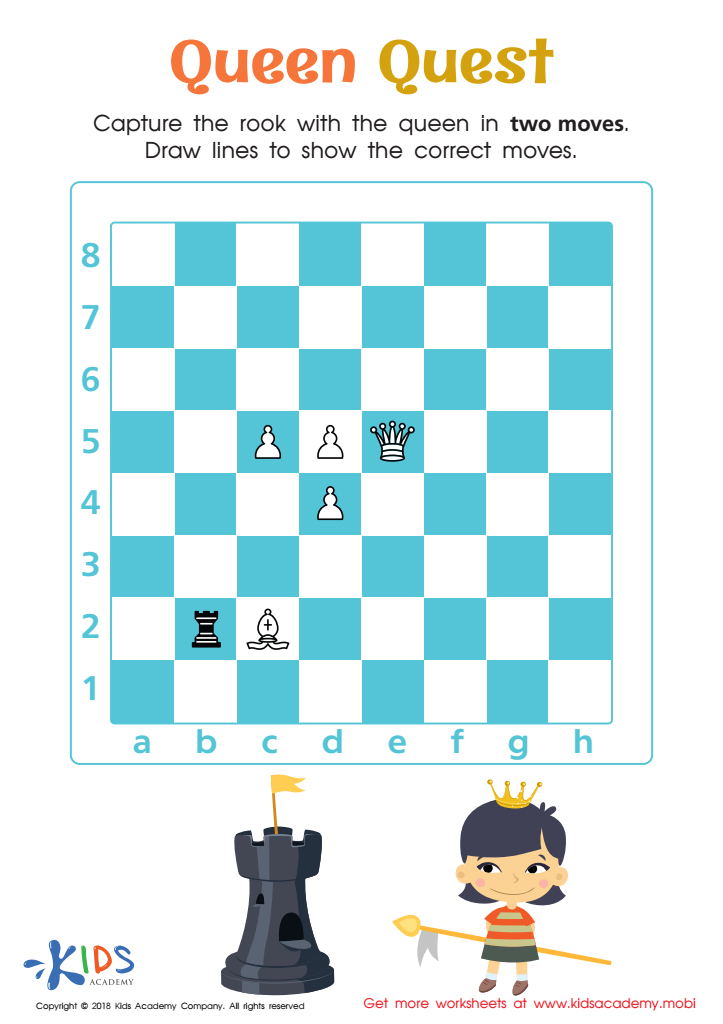
Queen Quest Worksheet
Want to test your child's chess skills? See if they know how the queen, king, knights, rooks, and pawns move. This worksheet challenges your young one to capture a rook with the queen in two moves. Draw lines to show the queen's moves to complete the task.
Queen Quest Worksheet
Worksheet
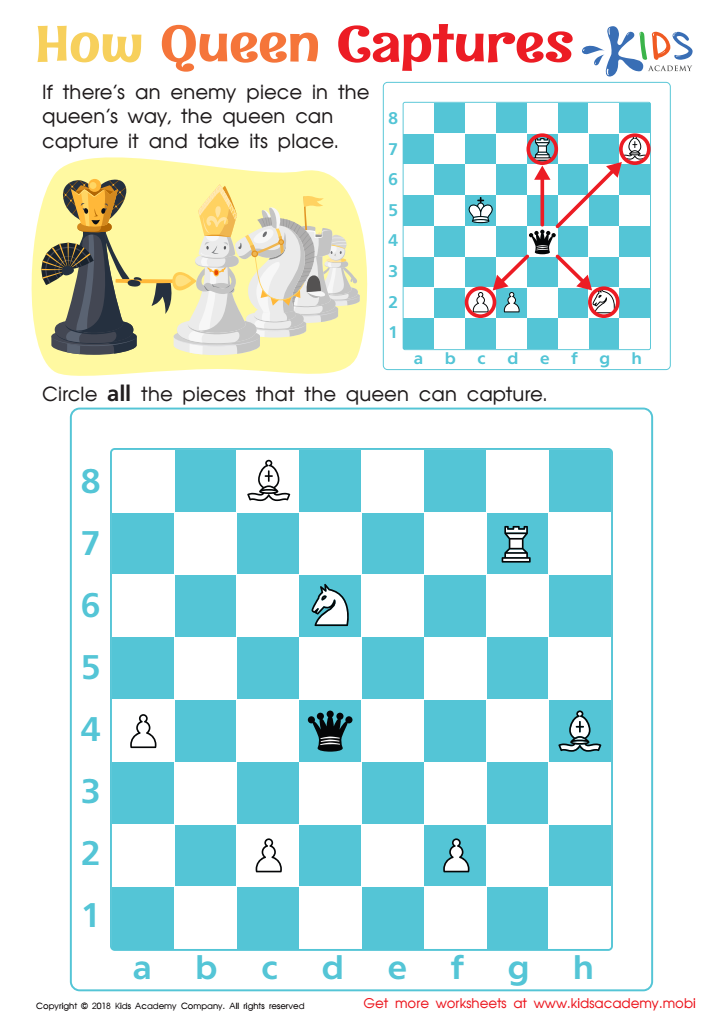
How Queen Captures Worksheet
Chess is a great game for sharpening math skills, strategic thinking, and knowledge of how each piece moves. If your child is interested, introduce them with this worksheet. It demonstrates how the queen can capture opposing pieces, such as another queen, and take their place.
How Queen Captures Worksheet
Worksheet
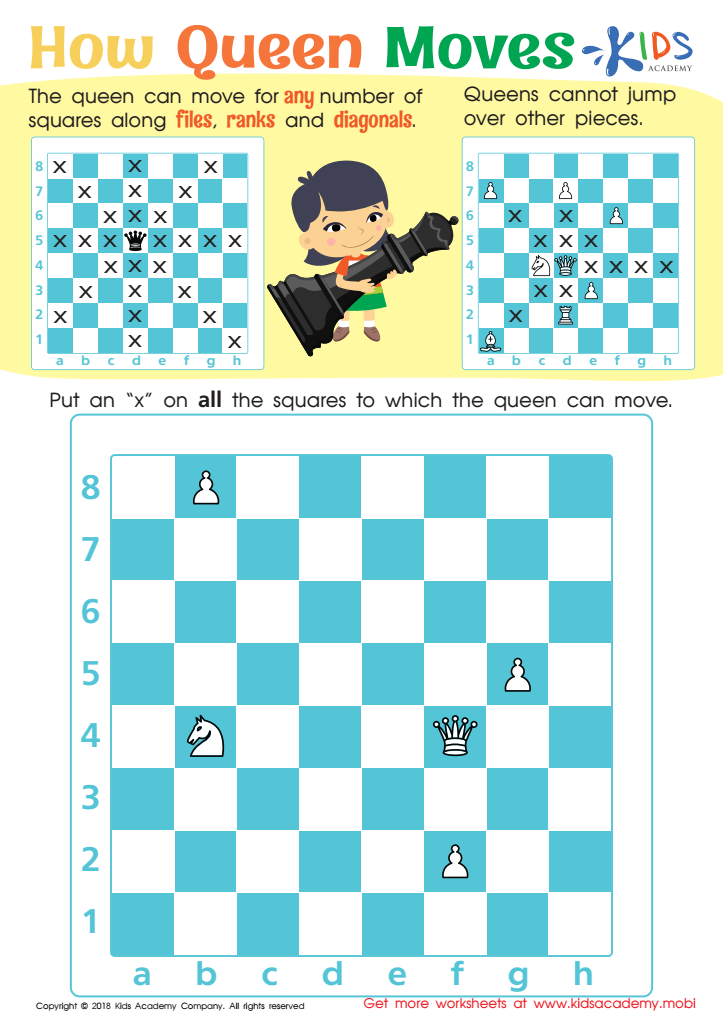
How Queen Moves Worksheet
Introduce your kids to the rules of chess using this worksheet! It shows how a queen can move for any number of squares along files, ranks, and diagonals. Ask them to mark an 'x' on the boxes where the queen can move. This is a great way to have your kids learn the basics of chess.
How Queen Moves Worksheet
Worksheet

Join Kids Academy for Free
Who is primarily going to use this learning content?