Creative Art Projects for Kids Using Recycled Materials
April 15, 2019
From empty milk jugs to scraps of fabric, it’s easy to transform trash into treasure when we put our minds to it. What’s more is that these creative projects can produce heartfelt gifts, timeless decorations, and memories spent with our kids to last a lifetime. If you’re looking for fresh ideas for recycled art projects, you’ve come to the right place! Below you’ll find junk art ideas that give common household trash a new life using materials like egg cartons, paper bags, plastic bottles and more!
Projects from Ordinary Household Items
Are you tired of throwing away toilet tubes and milk or juice jugs? Easily upcycle these items using the following ideas:
Egg Carton Chick
Decorate your house this spring with Easter crafts made from leftover egg cartons! Perfect for preschool, these colorful chicks will motivate little learners to recycle while getting ready for this special spring holiday. To get started, you’ll need to have these supplies on hand:
- Empty egg cartons, any color
- Yellow acrylic paint and brush
- Glue
- Scissors
- Black permanent marker
- Orange construction paper
- Small craft feathers (optional)
What to Do:
- First, cut apart each individual egg holder using scissors.
- Glue two egg holders together, with one on bottom, and the next on top.
- Paint the chicks with yellow acrylic paint and allow time to dry.
- Once dried, cut the orange construction paper into triangles to make beaks for the chicks. Glue the beaks on to the chicks, and add eyes using a black permanent marker.
- Add craft feathers to make the chicks fluffy, if desired! Add any other craft supplies as your child would like to decorate the chicks and to make each unique! Place the chicks in window sills, or decorate Easter baskets to make a festive scene!
Musical Drums
Most people recycle cans using the weekly city pickup, but nothing can beat reusing materials instead of throwing them away at all! This cool craft idea will stimulate the musician in your child by offering a way to use cans to create drums. Not only will you feel good about helping the environment, but you’ll love how this idea can keep your child busy for hours even after the project is done!
Supplies Needed:
- Empty and cleaned tin cans- be sure to remove the labels!
- Party balloons
- Scissors
- Rubber bands
- Chopsticks
What to Do:
- First, get started by cutting the neck of the balloon off and throwing it away.
- Next, stretch the balloon over the can and secure with a rubber band. Make sure to pull it as tight as possible without breaking it. To make different sounds with the drums, experiment with pulling the balloon tauter on some cans, or leaving it looser on others.
- Use the chopsticks and getting drumming!
Make this idea a learning experience and explore the science of sound using different can sizes, balloon brands, and more! Reuse old chopsticks by washing them with dish soap and warm water to make the most of this useful craft.
Unicorn Toilet Tube
Don’t throw that roll away! Cardboard toilet and paper towel tubes have a plethora of uses after your family is done using the paper products they once held. From pencil caddies to DIY crafts, the options are endless. Today, let’s discover a simple yet magical project that will delight any unicorn-loving little learner!
Supplies Needed:
- Leftover toilet tissue rolls
- Scraps of yarn, preferably in a rainbow of colors if available
- Glue
- Black permanent marker
- Scissors
- Craft foam board
- Craft paint and brushes or colored paper
- Small googly eyes (optional)
What to Do:
- Begin by either painting the tubes with craft paint and allowing to dry, or by covering each roll with colored paper.
- If wrapping, simply cut strips of about the same length as the tube and secure with glue.
- Using scraps of yarn, bundle them together and tie together at the top of the bundle. If using a roll of rainbow-colored yarn, cut strips of yarn roughly around the same length. Be sure to cut about 20 strips of yarn for each unicorn mane and tail, depending on the size of the string. Bundle the yarn strips together and tie at the top.
- Glue the mane by taking the top section of the yarn bundle and gluing it just inside the top of the roll, making sure most of the mane hangs out of the tube.
- Holding the roll upright so that the mane flows over the top of the roll, take the tail bundle and glue to the middle back of the roll.
- Using the foam board, trace and draw a horn. Cut it out and glue it to the top of the unicorn, on or near the mane. Repeat this process to create two ears to glue on either side of the mane.
- Use googly eyes or draw them on using the black marker, whichever your child prefers!
- Paint on cheeks or decorate in any other way your child would like!
Projects from Bottles
Any list of recycled crafts for kids would not be complete without using one of the most common household trash items: plastic bottles! Whether you buy 3-liter soda bottles or buy water in bulk, there’s no denying that these plastic containers are needlessly filling up our landfills and harming the environment. Try these fun ideas to put those old bottles to good use!
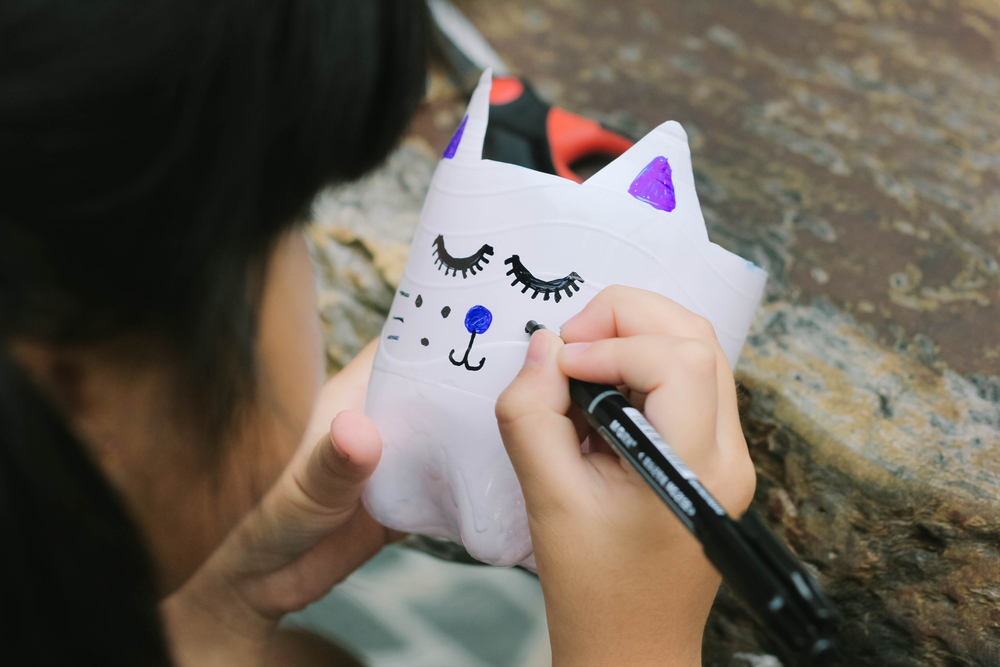
Make a Homemade Lava Lamp
Why buy a lava lamp when you can make your own at home? This DIY version will give empty plastic water bottles new life!
Supplies Needed:
- Empty water bottles
- Water
- Cooking oil
- Food coloring
- Alka-Seltzer tablets
- Spoon
What to Do:
- To get started, fill an empty plastic bottle with water, adding enough to make it about a third of the way full.
- Next, add a few drops of food coloring and stir well.
- Add cooking oil until the bottle is almost full and allow the water and oil to settle.
- Finally, add a few pieces of Alka-Seltzer to activate the lava lamp!
Water Bottle Flowers
With droughts in places like the West Coast, it might be difficult to find flowers growing in the neighborhood. Create your own with this unique project!
Supplies Needed:
- Acrylic paint and brushes
- Water bottles
- String lights
- A nail
What to Do:
- Cut the plastic bottle along the ridges just above the label so it cuts the top portion along with the neck and cap off.
- Keeping the cap on, hold it while making vertical cuts around the top part of the bottle. Some even include ridges that can help with this, and if so, cut along those ridges in even spaces, making an inch and a half cuts.
- Next, round out the edges to make petals, and pull the petals back towards the cap.
- Paint the flowers any color your child would like and allow to dry completely before adding an optional second coat.
- After the paint is dry, poke a hole in the middle of the cap using the nail. Use the hole to place a bulb from your string of lights.
- Wrap the string of lights with your newly made flowers around a tree or on outdoor stair railings to beautify your house with recycled plastic!
Projects from Paper Bags
Oh no! You went to the grocery store and forgot to bring your reusable bags! Or maybe you had to buy brown bags for your child’s field trip but don’t need the extras. No matter the reason, make sure to put those leftover brown bags to use with the following ideas for fun-filled crafts!
Bunny Bag Puppets
The best DIY recycled art project ideas are those that kids can use again and again! After making puppets with leftover brown bags, help your child put on an Easter-themed puppet show for your family, and watch as your child finds delight in putting these puppets to use time and time again.
Supplies Needed:
- Small lunch bag
- 1-2 sheets white and pink construction paper per puppet
- Markers
- Clear tape
- Glue
- Pencil
- 2 Pipe cleaners in the color of your child’s choice
- Googly eyes
- 1 pom pom per puppet
What to Do:
- Start by cutting the white construction paper to fit the bag. Tape or glue the white paper over the entire front of the bunny puppet.
- Using the white and pink paper, sketch out and cut ears to glue on to the top of the bunny. First, cut out the outer ear using the white paper, and make inner ears using the pink. When finished, fix the ears to the puppet.
- To continue, draw an oval on the pink paper and cut to make the pink underbelly of the bunny puppet. Glue into place on the bag, in the center. Likewise, draw two smaller circles using the pink paper and cut them out to create rosy cheeks for your bunny. Set the cheeks aside before gluing into place!
- Cut each pipe cleaner into equal thirds and tape these on both sides of the face to make whiskers.
- Now, glue the cheeks on the face, slightly overlapping the pipe cleaners to cover up the tape on the edges of the whiskers.
- Finally, glue a pom pom in the center to create a nose!
Paper Bag Season Flipbook
One idea for an easy art project great for elementary students is to make a creative flipbook from grocery bags that can be used to learn a science concept your child needs to master: the four seasons! Along the way, decorate the flipbook by coloring using glitter gel pens and magazine cutouts!
Supplies Needed:
- Brown grocery bags
- Scissors
- Yarn
- Glue
- Pencil
- Magazine images/cutouts (optional)
- Craft supplies to decorate
- Small hardcover board book
- Hole punch
What to Do:
- Using the pencil and children’s board book, trace the shape of the book on a brown bag and cut out the squares. Make sure to have enough paper to cut out at least 6 squares.
- Stack the squares together and punch 2-3 holes on the left side to create a space for the yarn later on when binding the book together.
- The book should be set up as follows: the top square will become the cover, the first page will be winter, followed by spring, summer, and finally fall with the last page serving as the back cover. Number the inside pages.
- Next, it’s time to label and decorate! Task your child with searching through magazines or on the web (while supervised) for images that remind him or her of the season on each page. Print or cut out the images. On the inside pages, glue the cutouts and color pictures or symbols to represent each season.
- On the front cover, encourage your child to personalize and decorate his or her flip book! When finished, use the yarn to tie the squares together to create a binding.
Upcycled DIY Baskets
Crafts from recycled materials could serve many purposes around the house. Whether for Easter or all year long, baskets can come in handy while making for wonderful household décor. This idea repurposes brown grocery bags in a creative way!
Supplies Needed:
- Large brown grocery bags
- Mod Podge or Collage Pauge decoupage
- Balloon
- Decorations such as magazine pictures
- Scissors (optional)
What to Do:
- First, be sure to blow up the balloon and tying off the neck. The balloon will be used to shape your basket.
- Next, it’s time to get ripping! Help your child rip or cut the bag into small strips. Don’t worry about exact measurements as the strips do not have to be uniform in size or shape. Just keep ripping until you have a large pile of strips!
- Use the decoupage to wet the strips and stick them to the balloon, overlapping strips, much like you would if you were making a project using paper mache. Cover the bottom portion of the balloon, and work about a third of the way up the balloon.
- Create a handle by connecting one side to the other by going up the top half of the balloon and down the other side.
- Now it’s time to decorate! Let your child take the lead and decorate the basket as he or she wishes, using magazine pictures, polka dots, stickers, etc.
- Let the basket dry completely before handling! After drying, simply pop the balloon to detach the basket. Fill it with Easter grass or potpourri for a beautiful household decoration!
Children’s recycling projects can help repurpose your trash to keep everyday household waste out of landfills. Inspire your child to care for the planet by finding ways to recycle while having fun! Get started today to make this spring a memorable one by creating simple and useful crafts from items easily found in a garbage can near you!


